Using PIL
In this part, we're going to play around with a couple of functions from the PIL library. For more information, be sure to check out this tutorial, http://effbot.org/imagingbook/, where some of the content below is taken from.
Opening and Displaying Images
The first thing you want to do after successfully installing PIL/pillow, is import the module as follows:
from PIL import Image
One important thing you want to do when you are working with images is to make sure the images are in the same directory (folder) as your code. This is probably the source of most bugs when working with PIL. To open an image, simply use the Image.open function as below:
im1 = Image.open("img1.png")
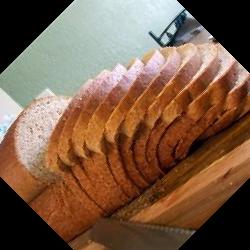
This will store the data encoded in img1.png into the variable im1. Its important to note that when you run this code, your image won't show yet. To show the image, you can run im1.show(), which will open up the image in Preview or Windows Photos, or whatever program you use to display images. This can be useful when you want to test the effects of individual image manipulations without having to run your entire project over and over. For me, img1.png is this amazingly good picture of bread:

Awesome!
Manipulations with the Images
With PIL, its very easy to manipulate the images that you have in your project. We can take a look at a few here.
Rotation
To rotate, you'll want to call the following:
im2 = im1.rotate(45)
im2.show()
The rotate function takes in degrees as an argument, and rotates the image CCW. So, for my image, it would show the following.
To save the new image to your disk you would call
im2.save("im2.png")
This will save the contents of im2 into the file im2.png in your working directory. There are also functions for other basic tasks, such as rotating and cropping an image, which are just function calls from within PIL. A lot of these can be Googled (or Bing-ed, I guess), and code samples pop up which implement many image processing techniques in just a couple lines of code. Be sure to cite your sources!
Changing Pixels in an Image
Taken from here.
To change individual pixels, you have to load the underlying pixel map, or a 2D list where each element is one pixel in the image:
img = Image.new( 'RGB', (255,255), "black") # create a new black image
pixels = img.load() # create the pixel map

for i in range(img.size[0]):
    for j in range(img.size[1]):
        newPixel = (i, j, 100) # whatever you want here
        pixels[i,j] = newPixel

img.show()
This goes through all the pixels (loops through width and height), and sets them to be a certain r,g,b value.
Using Images from within Tkinter
The hardest part about using the PIL library is integrating it with Tkinter, and the event-based animation framework that we've learned in class. To use your images from within Tkinter, the key is to have these lines of code first:
from PIL import ImageTk

im_tk = ImageTk.PhotoImage(im1)
What this will do is it will convert the PIL Image object into a Tkinter photo object that you can now use in your animation. To draw the image you can now call canvas.create_image, as follows:
canvas.create_image(x1, y1, x2, y2, image = im_tk)
And this will draw the image on the canvas! Make sure to initialize im1 and im_tk inside your init() function, and make the call to create the image in your redrawAll.